Images are everywhere. Nowadays, we can’t expect a mobile device, laptop, or computer to be without an image. In fact, images are used for various reasons: to capture memories, feature products, take notes, and more.
However, when students need to work on the notes they capture, they have to convert the text from the picture into an editable form. One way to do so is by manually typing down the text from the image into a notepad.
Alternatively, there are various other less time-taking methods to do the same. Read this detailed guide to explore and learn about those methods!
Method 1: Google Lens
Google Lens is a visual search tool from the Google Workspace. It uses advanced artificial intelligence to understand what is shown or provided to it. After that, it takes certain actions based on the information provided.
Students can use Google Lens on both computers, laptops, and mobile devices to extract text from an image. That said, these are the steps involved in extracting text through Google Lens:
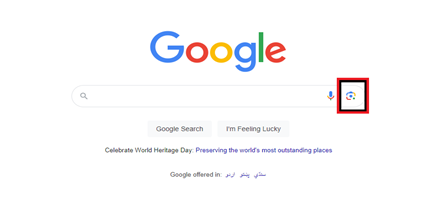
- Open the Google Search app on a computer, phone, or tablet.
- Locate the Google Lens icon from the search bar and click on it.
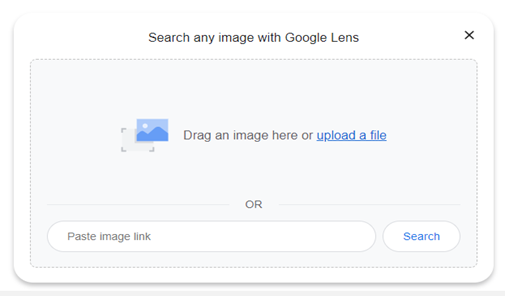
- Scan the image directly if it is on another device than what you’re using. Alternatively, you can drag and drop the image, upload it, or submit the image’s URL.
- Scan the image directly if it is on another device than what you’re using. Alternatively, you can drag and drop the image, upload it, or submit the image’s URL.
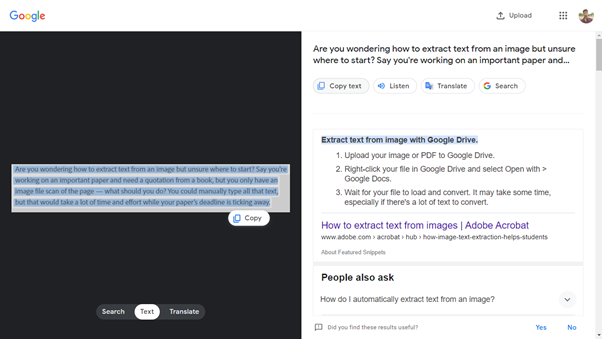
- Wait a few seconds until the image is scanned. Click on the Text to access the Copy text
- Select the amount of text you want to copy. Then, click on the Copy/Copy text option to copy the text to the clipboard.
Method 2: Online OCR Tools
Online OCR tools are web-based and they detect, identify, and fetch text from an image. They use Optical Character Recognition (OCR) technology for this purpose. They can also be used to extract text from other files, such as PDFs.
We recommend all the students use this method of image-to-text extraction. Why? Because this method is the easiest and most effective one in terms of accurate results.
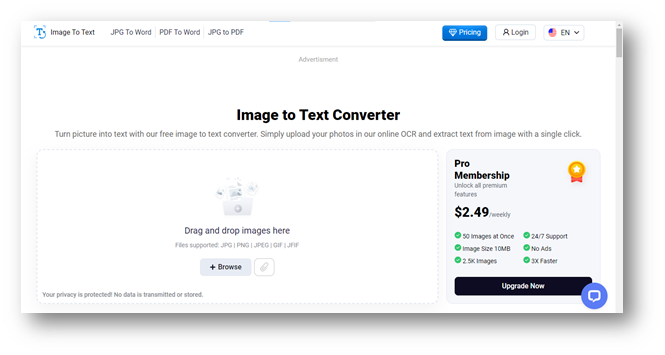
For example, Imagetotext.io is one such tool. It is powered by Tesseract and other Python libraries to make text extraction happen. The things we like the most about it are its free-of-cost utility and a very simple-to-use interface.
The text extraction process starts with uploading the image. There are a few ways you can do that and those are:
- Copy and paste the image into the input box.
- Drag and drop it.
- Enter the image’s link if you’re fetching one from the internet
- Click on the Browse button to upload it from the system.
Once the image is uploaded, click on the “Submit and Extract” button. Wait for a few seconds until the extraction process completes.
The extracted text will appear in the result window. You can click on the Copy icon to copy it or the Download button to download it in TXT file format. You can also repeat the process for other images by clicking on the Start Over button.
Method 3: Microsoft Word
Microsoft Word doesn’t have a built-in feature to convert images to text directly. Instead, it has a PDF reader option to convert an image to PDF first and then to editable Word files. Here are the steps to make this happen:
- Open the Microsoft Word.
- Create a new blank document file. Click on the New > Blank Document button for this purpose.
- Paste the image into the document file you want to extract the text from. If you want to extract text from multiple images, add all of them at once.
- Select File > Save As.
- Choose the location to save the file while choosing “PDF” from the file type.
- Open Microsoft Word once again.
- Double-click on the PDF file saved and select Open with > Word.
Your PDF document (with the image inside) will be converted into an editable Doc file. Edit the file, copy the text from the image, or start working on it on the same document.
Method 4: Google Drive
If you find it convenient to use Google Drive over Microsoft Word, use Google Drive’s built-in OCR feature to extract text from an image. You can do this for various file types, such as JPEG, PNG, GIF, and PDF. Here are the steps to follow:
- Open the Google Drive on your device.
- Hit the New button > File Upload. Go to the location where your file is saved and click on it to upload it.
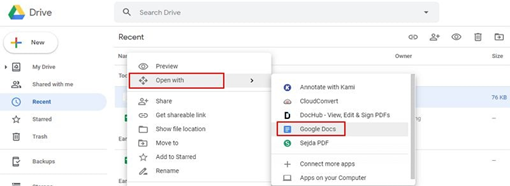
- Right-click on the file once it is uploaded to Google Drive.
- Select Open with > Google Docs.
- Wait until the file and text load into the document version.
Once the text is extracted from the image into the Docs file, you can edit, work, and study from it. If the format changes during the extraction process, edit it to make it like you want.
Conclusion
To extract text from pictures, students can use different online methods. One way is with Google Lens, where you scan the image and copy the text.
Another option is using online OCR tools like Imagetotext.io, where you upload the image and extract the text. Microsoft Word and Google Drive also have features to help.
With Word, you save the image as a PDF, then open it to edit the text. In Google Drive, you upload the image and open it with Google Docs to extract the text.


